Bike Handling in a Group Setting; The Friendly Shoulder Bump… Or Elbow, as May Be Necessary (and Probably Wiser).
This post was prompted by reading Bike-Handling Basics #6: How to Do Pro Tricks (Read number 5 for the cool shoulder…)
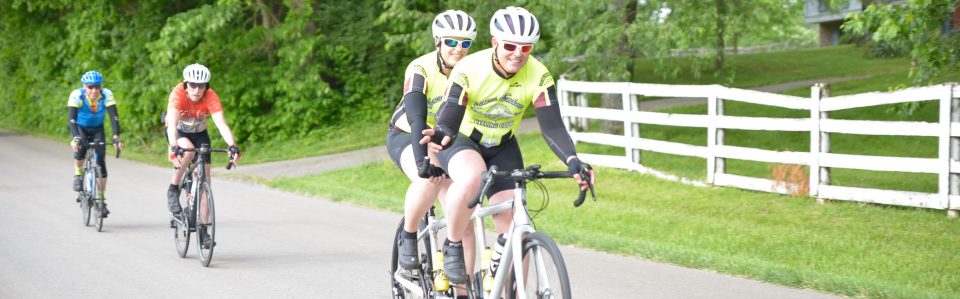
A few weeks ago we had a double pace-line going of around 20 cyclists. Not big by our standards, but not small by any stretch, either. We were cruising down the road at a spirited 22-mph pace when the road started getting choppy along the right side. I was in the left part of the right lane. My counterpart up front started inching closer to me, to the point he started going over the center crown of the lane. He pushed me closer to the double-yellow until I simply wouldn’t go any further left. I’m not getting my handlebar anywhere near over the yellow for anyone… he inched closer.
Now, right there, most people will freak out a little and say something. Not a bad reaction, indeed. Another cyclist starts crowding you like that, it gets dangerous.
Well, folks, there’s no need to get belligerent about being crowded a little. Also, there’s definitely no need to cross over the yellow line into opposing traffic. The key is to ever-so-slightly bend your elbow so it extends beyond the end of the handlebar so it rubs against your counterpart’s elbow. If they’re novice enough to crowd you during a ride, they won’t be able to hold it together when you start putting an elbow into them.
In my case, I wasn’t nasty about being crowded. I didn’t jab my elbow into him, and I certainly wasn’t trying to get him hurt. The elbow did its job, though. I just kind of eased it out there till he bumped into it… After bumping arms with him twice, he moved off of me to the right a little bit and that was the end of it.
As it turned out, I didn’t know why my friend was crowding me like that until he mentioned that the right side of the lane was horribly choppy and he couldn’t keep the pace in the bumps. Things get chippy in a group sometimes. The elbow, or even pushing a on another cyclist’s hip to let them know they’re getting into your personal space a little too much is a great way to set boundaries and diffuse a situation before it gets too messy
Just remember, you get too pushy and you could end up knocking a bunch of your friends down in the process. It is very important that we exercise care, caution and restraint, always remembering that we’re traveling down the road at 40 feet per second.
A New Cable Box Could Be the Best Thing That Ever Happened To My Summer…
I’m a creature of habit. I find something I like and I stick with it. Easy, peasy, lemon squeezy.
A few months ago, at the urging of our old cable box that kept putting messages up our our screen, trying to cajole us into taking our old cable box in for the latest and greatest, my wife finally succumbed to the pressure. I could have held out indefinitely.
In came the new box, and the vastly improved HD version of all our favorite channels.
And just like that, I no longer knew where my favorite channels were. And just like that, I quit watching TV. Sure, my kids are prone to binge on The Office or Friends, but I’ve hardly flicked the power on in the last couple of months.
Now, to be fair, I still stream an episode of Diners, Drive-ins and Dives every night to fall asleep to, but Lord Almighty, I’ve really enjoyed having time to do stuff. I actually pulled out all of my woodworking tools to build a new, vastly lighter, bike rack for the camper the other day (I wrapped it up yesterday before heading over to the Tuesday Night Club Ride).
To be fair, this’ll only last till the snow flies, and they’re saying this winter will be a doozy, but I’ll take it while I can get it! Thanks Cable Company!
Jim
60,000 Miles on a Bicycle, and What It’s Taught Me About Life
Last Sunday, I rolled over 60,000 miles since I started keeping track in 2011. In terms of a special milestone, it’s not all that special. There’s a phone book of people who ride that in a year, worldwide. It’s my milestone, though. I did it, and what’s important is that I’ve had fun putting almost every one of those miles on my bikes.
Cycling has evolved for me over the last eight years. The first few weeks weren’t all that impressive, until I bought a decent bike. An adult mountain bike. After that, a cavalcade of road bikes… and it was Katy bar the door from the moment I first rode my Trek 5200. I dropped 20 pounds so fast it actually scared my wife. I was skinny. Then I learned how to eat, ahem, for an active lifestyle and have been okay ever since. It could be said that I certainly do enjoy eating a lot more.
Anyway, I’ve had my bikes, one or the other, all over the place – especially all over our home State of Michigan, and after all of those miles, I’m still excited when a big tour rolls around. Who am I kidding? I still get fired up, just to run a quick loop around the neighborhood. For those who ride a lot, you’ll know exactly what I mean when I write that cycling has been my source of fun, rather than a source of exercise. The fact I burn a lot of calories just comes with the fancy pedals.
I headed out last evening to hammer some miles out with my friends and, unlike the stock market, past experience is an indication of future returns. I was driving home with a big smile on my face, thinking about how lucky I am to be me. I’m nothing special, of course, but I do believe I’m a blessed guy to have the wife, kids, friends, bikes and life that I have.
I don’t have a whole lot of money. I don’t have a big, fancy house. I do have a smokin’ hot wife, two awesome daughters, some great friends, a good job, a stellar, clean life, (ahem) six bikes, good health… and some fantastic memories. Above all, though, I am happy.
What I’ve learned over the last 60,000 miles is that the miles don’t matter. It’s the spending time, regularly, with friends and family making memories. As we get older, most everyone wants to slow down time. The only way I know to do that is to take the time to enjoy life. A little bit, every day. When I take the time to savor where I’ve been and where I’m at, life slows down just a little bit… and it’s vastly sweeter.
And that’s enough to make any ex-drunk get a little misty. Keep coming back, my friends. It gets good enough, if you work for it, that you simply can’t believe that things worked out so well.


Important Question of the Day: Should a Grown Man Take the Time to Wax and Polish a Bicycle?
The obvious answer to that most important question; should a grown man take the time to wax and polish a bicycle?
No, of course not, because your bike is likely powder coated, it won’t need to be waxed. Also, if you own a matte finish, such as the one on my Specialized, without question, no.

However, should you just happen to own a badass vintage bike that was stripped, painted, and shot with enough clear coat your Floridian grandma would be comfortable in Siberia, then the no-brainer is yes…

Sometimes you have to see just how deep you can make that black look.
Am I Worthy? A Question Every Cyclist Except MAYBE Peter Sagan Grapples With.

I have a Punisher decal on both road bikes. I’m particularly fond of the one on my 5200 but like the two smaller decals on the Venge just as well. I like to look at the decal when I’m hurting and wanting to quit – they help me to dig deep when needed.
I wonder, from time to time, to myself, whether I’m worthy of displaying it on my bike, though. Taken the wrong way, as if I were arrogant enough to think of myself as a Punsiher of cyclists, it could lead to… uh, unnecessary misunderstandings.
In the end, a friend gave me the originals that went on the Venge, so I justify it that way… And if I have to have the discussion among friends, so be it. In the end, when I’m in the pain cave, I like looking down at that decal for a little boost. I also have to remember that which is most important; I am fast enough for what I want to put into cycling. Cycling makes me happy. I have no desire to work hard enough at it that I lose the fun.
DALMAC Maintenance; AKA Midseason Maintenance
Friday, after getting home from work, getting my 17-1/2 miles in, showering, and eating some dinner, I got to work on the bikes for DALMAC. My Trek was solid, but I want it to be tip top. DALMAC is the pinnacle of our season, it’s what we train for all year long. Mrs. Bgddy’s bike needed some attention as well, as her back brake was sticking ever so slightly.

I got right to it, as we’ve got limited prep time before we head out Thursday morning and I wanted to have the weekend to test the bikes out before the road trip. First, the chains. my wife and I get a year out of our chains. I changed the Trek’s chain last year during DALMAC because I’d bent a plate on a missed shift into the baby ring to climb a hill. I still had some life left in it, but I’d bought new chains months ago and the chain was right on the edge. I decided to bag them and take them with in my gear bag. This year, if I needed a chain, I’ll have a spare with me. After that, I had a little bit of water sloshing around the frame from the A-100, so I pulled the seat post and drained about a tablespoon. Saddle back in place, I gave all of the bolts a once-over and called it good. Finally, as I always do after a ride in the rain, I cleaned the rear derailleur housing. It collects a lot of crap in the spray. Sure enough, there was some grit present, so a quick wipe down and lube, and I put everything back together. I gave the bike a quick clean and filled the water bottles for Saturday’s 100+k.
Then to my wife’s bike, which needed a little more love. Her chain, also a full year old, was right on the edge, too, so that went. I cleaned up the rest of her drivetrain and took a look at that brake. With internal routing, I’m loath to fully take the cable out as it has to be rerouted through the frame. I pulled it just far enough to clean out the little bit of debris at the shifter and the back cable housing. Lubed everything and put it all back together. It was a lot better, but still not perfect. I’ll probably just wait to get it tuned up after the season unless it acts up again.
With that, and the sunlight fading out for the night, the bikes were tip-top and ready for Saturday’s festivities. The bikes were smooth and quiet for one of the best riding days of the year. A little on the breezy side, but with cooler temps having ushered in, it was all awesome, all morning long. We started off with arm and knee warmers but ditched those around mile 30. We stopped at miles 30 for a restroom brake and 37 for a coffee and breakfast sandwich, and that was it for stops (quite impressive, really – 65 miles is a long way on just two stops – the cool weather helped immensely). I had a smile on my face the entire time. While there was a lot of traffic on the route, it was a really fun loop with lots of terrain changes and a few exceptional hills, including a big descent down a straight, nicely paved 8%’er that had us top 43-mph on the way down – escape velocity.
Finally, we’ve got a 58 miler planned for this morning. Six miles into the ride I’ll top 60,000 miles since I started tracking in 2011… I’m pretty fired up about that little milestone. It sounds neat, of course, 60,000 miles in my 40’s. What’s really important is the memories and friends my wife and I made over all those miles. Thinking back over just the highlights, it’s simply too good to put into words. Throw in my most-excellent recovery and all I can say is, it’s wonderful to know that you’ve been touched by the finger of God, to know you’ve been saved and blessed beyond measure, rising from a state of hopelessness and despair to peace and contentment.
Good times and noodle salad, my friends.

Cycling and Brakes; One of the Easiest Upgrades on a Road Bike There Is.
There aren’t many reasons to upgrade brakes on a bicycle, but there are a few.
- You currently own a bike with Axis 1.0 brakes.
- You would prefer a freakin’ sweet set of brakes that perfectly match your A bike:

- Your older bike’s brakes won’t fit a 25mm tire and 25+mm tires are all the rage nowadays.


- Your older bike’s brakes won’t fit a 25mm tire and 25+mm tires are all the rage nowadays.
I could probably come up with a few more; your bike’s brakes just don’t brake well, etc… but I have personal experience with the top three, so let’s just move on.
Now, the first thing one must ask oneself, does putting new brakes on a classic steed take away from its classic awesomeness? Well, technically yes. Then you have to ask yourself, is it enough to matter? NO! With the possibility of an F-bomb in there, if necessary. Especially if you want to get a modern set of wheels on that old badass steed, as was the case for me. I like the idea of the old frame with modern equipment on it, but that’s just me (I’ve got a friend who had a steel Merckx restored and put SRAM eTap on it). Take into account, also, that every generation of Shimano parts upgrades the lower levels to the level above for the previous year… In other words, my old 1999 Ultegra brakes were great by 1999’s standards. 2019 Shimano 105 brakes (something like four or five generations of advances) are better and lighter than the higher grade ’99 calipers.
Moving on, for a modern road bike, if you can find a set of brakes that matches your bike, there’s no question the upgrade is muy bueno, unless said upgrade takes one over the line into gaudy.
Now, on to the good stuff! Let’s change those bad boys out!… For the front brake, turn the wheel so the back of the fork faces you. Don’t bother pulling the wheel off or removing the fork. That’s entirely unnecessary. With the wheel turned, you’ll either see a post there, or it’ll be inside the fork a ways (I have one of each style – the Trek, the bolt tightens to the outside of the fork, the Venge, it’s inside). Either way, it’s the same thing; loosen the bolt after removing the brake cable and popping the cable end cap off. With the bolt end off, you can simply pull the caliper from its mounting hole.
Guess what’s next?! You put the new one on! Tighten that bad boy up (for this part, it’s good to consult manufacturers recommendations so you don’t over-tighten the bolt and wreck your fork). To get the specs for your bike, simply Google it. I go with “Trek 5200 Torque Specs” for the Trek, and guess what for the Venge?! Right! “Specialized Venge Torque Specs”… Anyway, you’ll have to watch because the brake cable housings may need to be changed out or cut. For the Venge, I had to cut housing for the front. For the Trek, I needed a longer housing so I had to get a 2′ length from the shop and re-run the housing, cutting it to the proper length while making sure the “Bontrager” emblem was centered and unobstructed. Center the brake arms over the wheel and lightly tighten the bolt. Install the brake cable into the pinch lock on the caliper. Make sure you use the spacers provided to shim the caliper back from the fork or chain stays as necessary. You don’t want you caliper to rub the paint off your fork or chain stays (I had to double-shim the new front caliper on the Venge to get it to clear). Once you’ve gotten everything where you want it and centered, tighten down the bolts to the recommended torque.
Finally, we have to center the pads on the brake track of the rim. To illustrate, I’ve got two photos of my main road bikes, head on:


The Trek, on the left, cannot be closer to perfect. The Venge, on the right, the left pad (right side of the photo) was a little low. Taking this picture alerted me to the fact that they brake pads weren’t perfectly level as they should be, so I fixed the problem immediately. To align the brake pads, I install mine square to the rim. Some say the front of the pad should hit the rim before the rest of the pad, but I think that’s mainly nonsense. Eventually the tip of the pad will wear so the whole pad hits the wheel flush anyway. So, loosen the bolt that holds the pad to the caliper arm. Center it on the brake track and squeeze the brake lever to engage the brake. This will hold the pad where you want it while you tighten it down. Once the pad is centered and aligned, tighten the bolt again. Switch sides. Then do the rear. If you want to install the pads so the front hits the rim first, simply fold a business card in half and insert it between the back of the brake pad and the rim and tighten everything down with the card betwixt. When you let up off the brake lever, the pad will be just a little skewed so the front hits first.
Once that’s done, you’re ready for the test ride to make sure you did everything right. First, give both brakes a squeeze to make sure you’ve got the cables tight enough. Then look everything over closely. Anything missing? No? Good, from there, move on to the rolling test. I’d recommend a slow roll at first, then work up to speed. Let’s not bomb down a mountain pass on brakes that haven’t been tested.
Day Two of My Much Better Back; Stupid Lumbar Support Car Seats…
My Thursday evenings have been thoroughly packed for years to the point I can only afford a short ride after work. After having found my lumbar support digging into my back for better than a couple of months, with a four-hour-a-day commute, and correcting the issue, I feel so much better it’s hard to put into words. I went from fully healthy, bounding up dozens of flights of stairs every day at work to having a tough time walking two flights. I fought in my head for more than a month, trying to figure out what went wrong.
In fact, I was in so much pain when on my feet at work (a large part of my job), that when I discovered the lumbar support in my vehicle’s seat pushing into my back, I worried it couldn’t be that simple…
I rode last night, just my second day (first full day) removed from discovering the problem. I turned in an easy 14 miles in 43 minutes. That’s almost 19.5-mph, for a fun, semi-easy spin. It’s hard to describe the relief I’m feeling – not only the physical, but the mental. It’s not easy to go from fully fantastic to struggling to stay on your feet for more than a couple of hours. All I could think was, “what the hell?!”
I rolled out with the wind in my face, and was content to keep the pace mild, at 17-18-mph. Originally I’d planned on an easy day. On turning left, into a cross-headwind, I changed my mind on the easy part as I passed 20-mph on the computer. I wanted to see if I could break 19-mph with the stiff, late summer breeze.
Without ever really pushing too hard, just keeping it steady, I rolled into the driveway at 19.5-mph average. Good enough to be relieved that my back is back. I think I can turn the page on this ugly episode, thank God.


Happier days are ahead!
I Paid $2,000 for a Freakin’ Bike with No Kickstand?! Why Your Bike Doesn’t Come with One… And Why You Don’t Need One Anyway.
First, for the noobs that happen on this post, no, you’re not entirely nuts to think it’s crazy a bike shouldn’t have a kickstand as much as they cost. I know. I actually had one put on my first adult mountain bike – until it was pointed out how dangerous it was to mountain bike with a kickstand on the bike… then I couldn’t get it off the bike fast enough. So, if you’re miffed your bike doesn’t have a kickstand, consider a few things, first. Carbon fiber bikes don’t have a kickstand because you can’t install a kickstand in the traditional manner because the bike is carbon fiber. You can’t put that kind of leverage on the frame that isn’t designed for it without risking it cracking, especially bolting a metal kickstand onto a, for the lack of a better word, plastic bike. That’s simply a no-no. In fact, you’re not even supposed to use the old style trunk racks that suspend the bike from the top tube with a carbon fiber bike… you use one that supports the bike from the wheels. For aluminum road bikes, they don’t have the clearance to attach a kickstand in the traditional manner anymore, and as I covered earlier, it’s dangerous on a mountain bike when you ride on rough terrain.
And to tell the truth, the cool kids just don’t have kickstands anymore. We don’t need them, with a little innovation.
Try these options instead:


Our bikes are actually resting on the curb simply by leveraging the crank arm against the drivetrain, by way of the pedal. This only works on the drivetrain side of the bike with the pedal you’ll rest the bike on to the back of the bike. Don’t try it on the non-drivetrain side. Your bike will fall over. Also, be very weary of trying this with a bunch of people milling about. Almost invariably, some knucklehead will get too close and knock your steed over. If you don’t have a curb, place your helmet on the ground and leverage the pedal against the top of your melon protector. Seriously, it works.
Next up is the plain old lean against a post method:


For this innovative method of propping a bike up, the frame never touches said post. The saddle leans against the post, then you bring the pedal around (spin the crank backwards) to leverage it against the post. This is a solid way to lean your bike without contact to the paint. It’s quite solid and only uses the tires and two tiny contact points.
In a pinch and for photos, you’ve got the old “stick in the mud” method:
Without question, extreme care should be used when propping one’s bike up this way. It is most definitely NOT stable. One tiny gust of wind and your bike could topple. Great for photos, though. Especially side profile:


Next, we’ll go with the two-point lean:

In this case I used the saddle and my front tire. Because the bike is faced downhill, I chose the front wheel because I could turn it into the fence, making it so the bike can’t roll down – it’s wedged against the fence. The right brake hood would have worked as well, on level ground, though. If I wanted to turn the bike around, I’d have used the saddle and rear wheel as the leverage points.
Along the same line is the three-point lean. This works against a wall. Rear tire, saddle, front tire (the front wheel is turned in, toward the wall). This is exceptionally stable:

The three points in this photo are, handlebar, saddle, rear tire.
Then we go into another “photogenic” method of leaning the bike, the handlebar lean:


It should go without saying, this isn’t very stable but it’s good for a quick photo. If I’m around people, especially the normal public or someone who doesn’t treat their bike as well as I treat mine, I always go with the two or three-point lean. I’ve got too much invested in my bikes to leave the opportunity for a stupid person to be stupid around my ride.
For those really pressed, we don’t need anything to lean our bikes against…

Wedge the wheel between the car tire and the wheel well. It’ll stay upright easy enough. Just don’t get back in your car while your bike is set this way. The last thing you need is to forget it’s there and drive off. Don’t chuckle too hard, either. It happens.
Finally, this is for those who have a riding buddy, a favorite of mine when there’s simply nothing to lean your bike against:

Lean two against each other. Just make sure you’re not frame to frame… I’ve got my two touching shifter hood to seat post above. Get the balance right and that is surprisingly stable. This one is excellent at big, supported rides when they run out of rack space or trees to lean your bike against at rest stops.
So, my friends, don’t worry about why your bike doesn’t come with a kickstand. You don’t need one anyway. And who would want the extra weight?!
My Bad Back, and the Damndest Cause of a Mess of Pain…
I’ve written extensively over the last several years of my bad back. Before running it was really bad. While I ran it was manageable. Since I started cycling, fantastic has been the best word for it.
A couple of months ago I started having problems at work. I could do my job, but too many hours on my feet hurt. Bad.
I started stretching a few times a day. That helped a lot but it flummoxed me that I was having so much trouble. I figured it’d work itself out over time.
Yesterday morning, on the way to the office, my back started bugging me. I took an ibuprofen and that dented the pain, but the reason eluded me… and not knowing was like a giant splinter in my melon. I kept picking at it.
After work, back in my car and the pain came roaring back. It drove me nuts. I mile down the road and I was trying to play with my seat angle and I bumped the lumbar support button. The bar in the seat moved back. It should have been all the way back already. I pushed the button again. The lumbar support moved back another two inches. I’d been commuting four hours a day with that stupid thing wrecking my back for the better part of two months. No wonder I’d been sluggish!
And, just like that, my pain went away. I managed almost 20-mph (19.7) with Chuck over 19.7 of my 24 miles last night. I haven’t had a desire to be that fast in months. I’m sure it’ll take a week to fully recover, but I feel a mountain better this morning. I feel like me again. What a relief! Here I thought I was riding too much, or maybe I had done something unspeakably wrong to the Trek’s setup! Whew!
So, you may wonder how this could have happened… my daughter started driving and she has to adjust the seat to reach the pedals. She simply hit the wrong button.
