
Happy New Year’s Eve!
Happy New Year’s Eve, my friends. I hope the work we did in 2022 set the groundwork for a fantastic and prosperous 2023.
24-hours at a time. 11,001 times in a row. And counting.
How to Insert a Degree ° Symbol into a WordPress Block… The EASY Way.
So, if you’ve been around WordPress long enough to remember the good old days of the Classic Editor (before the reviled Block Editor was a glimmer in someone’s sphincter), you know the degree symbol was right there in a grouping of special symbols you could click on quickly to insert into a post. No such luck today, though you can still use the Classic Editor in Block form, so you can, technically, still access the special symbols when needed, but this is the old, clunky way:
Open a new Block, click on the Plus Symbols and under “search” type in “Classic” and pick the Classic Block. Then, click on the special symbols box, insert the degree symbol, copy it, then paste it in the block you’re typing in… or just always use the classic block for your posts…


But there’s a much easier way!
Press and hold the Alt key, then hit 0176 and let go of the Alt key. E Voila:
°
Now that’s sexy, baby.
UPDATE: Be sure to check out the comments for more great tips!
Learning To Meditate (Better) After 30-Years Of Recovery
I’ve been trying to figure out how to write this post for about six months and it finally hit me this morning while laying in bed while I was trying to fall back to sleep on a Holiday day off. So, here I am at 4:23 in the morning, writing this post.
I used to be a little prejudiced against meditation because I wasn’t ever going to be one of the hokey “ohoooooom” people, though my semi-ignorant disdain for what I used to believe were fake people has loosened over the last year. I look at the ohoooom folks like I would a fake martial artist who claims he can knock people out of a fight with his mind. Unlike the one-inch punch, the “no punch” is pure bullshit. However…
I learned to find me in meditation, though. I can still be the ruggedly handsome fella I am, without having to tip over to the odd.
For the longest time, I would filter my thoughts through a big sifter. Anything I didn’t like, including looking at whether or not my actions were decent, wise, good, or even worthwhile, would be thrown out as a useless thought. I became so good at this, my Tenth Step work took a matter of a minute a day, often resulting in me coming to the wrong understanding that I didn’t harm anyone or do anything worth reproach in a day. I’d come to the conclusion that, if I’d harmed someone, it was on them.
F***in’ hell, that was ignorant. And quite a bit narcissistic.
One morning, about ten months ago, I opened my eyes and found out just how wrong I was. The wrong-headedness was so steep, I couldn’t keep order to my thoughts and the way I perceived them. It was like one of those sleeper waves that looks to be harmless as it approaches but all of a sudden you realize it’s breaking three feet over your head and it flips you for a loop. If you’ve never been hit by one, you’re missing out. It’s a fun ride. As long as the wave is tumbling you helplessly over sand.
The only thing that brought order and peace to the wave of thoughts was meditation. I learned how to pay attention to what was happening in my melon (and in the melon committee) and sort everything out. At first, with all of the activity, it took upwards of an hour. After a time, I managed to get that down to ten to twenty minutes.
Today, usually right after I’ve written a post in the morning and while I’m shaving and showering for the day, I get into reviewing the day before. Did I wrong my wife? How about my kids? Did I do anything wrong to any friends? How about co-workers? Did I speak too quickly, or say something incorrectly, or carelessly? [ED. Normally we do this at night, but I fall asleep easily enough I don’t have to, and I’d rather work on such things when I can do something about them – the morning works better for me]. Then I turn to my feelings. Do I feel I was wronged? Was there anything I left unsaid out of fear that will lead to resentments later? What am I afraid of right now? How are my emotions holding up? Are they holding me up? What could I have done better yesterday? What can I do about that today?
Then, after I’ve cleaned myself up inside and out, I head off to wake up with my wife. I review where I went wrong the day before, if there was anything that needed tending to. We talk about anything in our marriage that needs looking at. Rather than dismiss everything I don’t like as garbage, I assess everything we talk about. I own all of my stuff and tell my wife what I will own and what I don’t, and why I don’t. Perhaps she misperceived something I did, or improperly ascribed motive to something I did. I handle all of this without lying or trying to hide bad intentions with good. Truth is subjective. Not lying and choosing to not be manipulative isn’t. [ED Your truth can be different from mine, but everyone knows when they’re lying or manipulating with untruth to skew an outcome]
What I’ve learned over this time is that I operate on a lot of fear. Fear that my behavior was bad enough that I pushed my wife out of our marriage was massive early on in this little experiment. I held fear that my wife wouldn’t change, of what things would look like if only I changed… I was driven by a hundred different forms of fear, as they say. With my new meditative inventory, I learned to live fearlessly. The easiest way to do this was to acknowledge my fears and talk about them with my wife… and yes, there was plenty of fear in that as well!
As we progressed, though, I learned that my fears were mainly what we call False Evidence Appearing Real. I chose to look at things differently. What I once thought was my wife attacking me (or weaponizing my words against me, as they say) was really my wife trying to help me move through the world a little less stupidly.
Once I took the fear out of moving through the world stupidly, I came to learn that I didn’t have anything to fear in trying to be a better me. I could lay anything out there and we’d come up with a solution together. Shortly thereafter, my wife was talking about her fears, too. And we’d work on those.
It didn’t take long to dispatch with much of the bullshit we used to sweep under the rug out of fear… to a point we had to walk around the freaking rug because it was too high to climb over.
And that brings me right back to this post. I’ve been trying to work out how to write this little bastard for months. And there I was, just laying in bed, meditating… and it hit me.
That’s how it works. Happy New Year’s Eve, eve!
How Much Should You Spend for Carbon Fiber Wheels (and How Good Are the Cheap Wheels)?

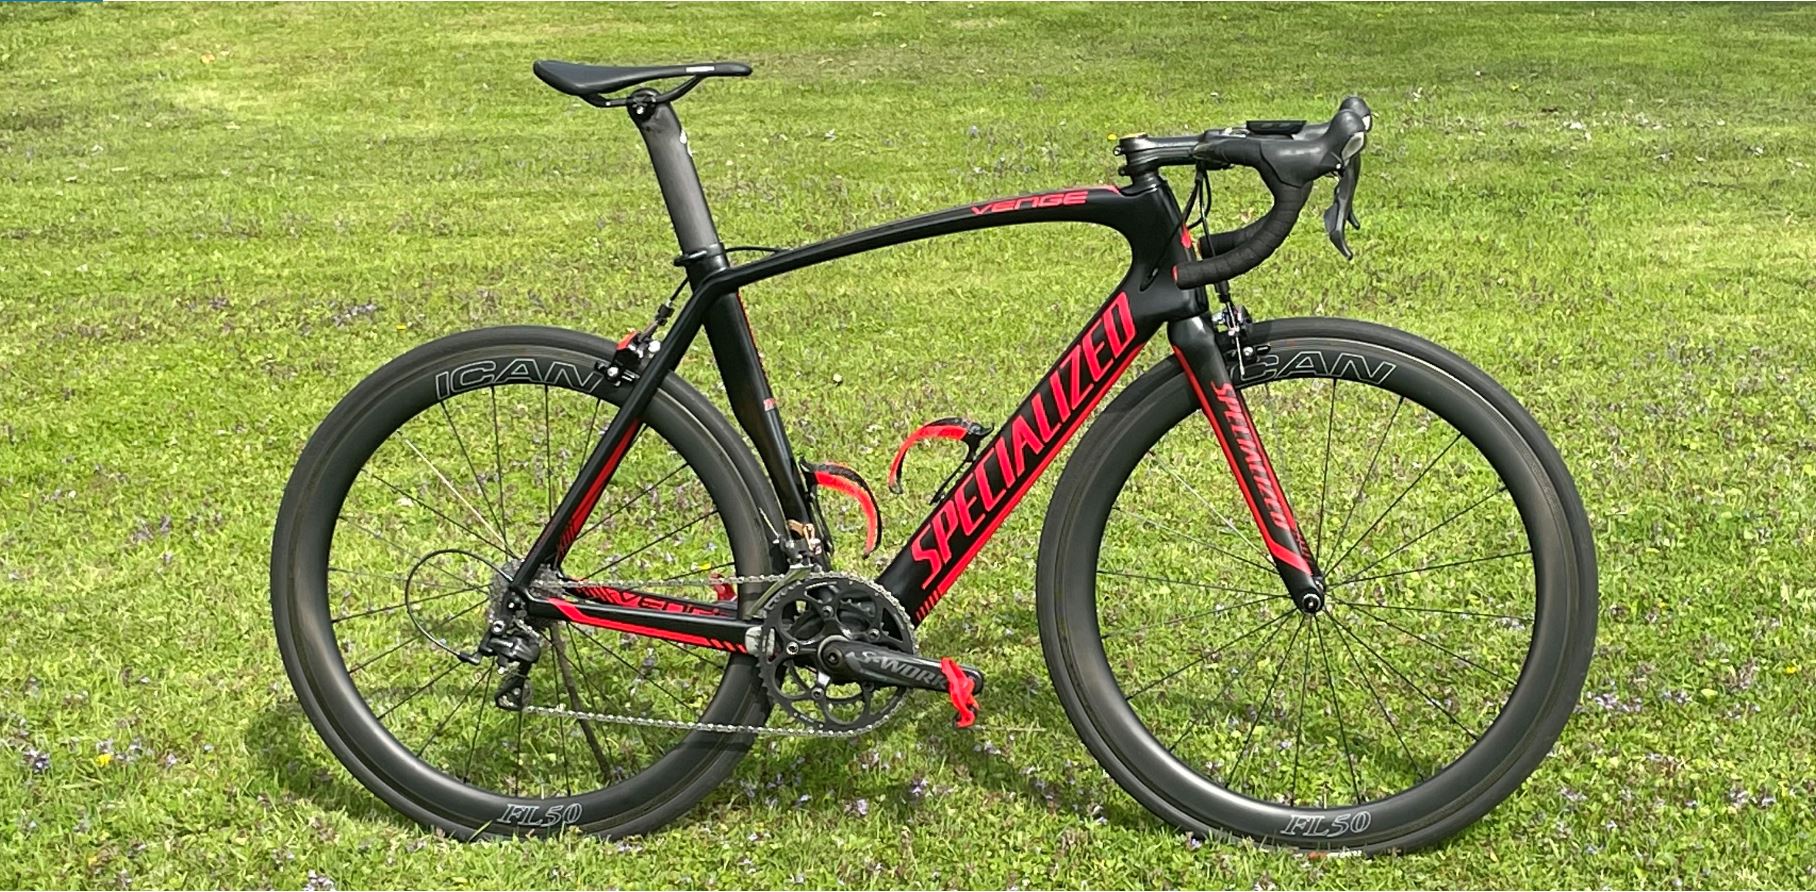
A couple of Specialized Venges on Ican wheels…
I’ve been a big fan of Ican wheels. My wife did get a bum rear wheel from them, that’s since been replaced, but other than one bad rim, we’ve got thousands of miles on Ican wheels with only a broken spoke or two – no more than we’d expect from any other name brand expensive wheel (I’ve had similar problems with a number of name brands such as Rolf, DT Swiss & Velocity).
My wife and I have three sets of Ican wheels; two sets of base price 38s and I have a set of Fast & Light 50s on my Venge. We have less of an investment in three sets of wheels than some spend on one wheelset (a little north of $1,600 for three wheelsets). We’ve put those wheels through the ringer, too. Multiple 23+ mph average rides, a few 20+mph centuries, countless 50+ mile rides… and when I ride an alloy set of wheels after my carbons on the same bike, there’s an unquestionable difference related to speed and effort.
So, when I saw this video on my feed, I was drawn to click on it like a moth to a porch light:
Without ruining the surprise ending, the cheap wheels weren’t the slowest, but they were close to the slowest, and a cheap set was among the fastest. In fact, two sets closer to the affordable end did quite well. The testers also didn’t test Ican wheels, so I have no idea where they’d come out, anyway.
The point is, if you can afford those $4,000 wheels, by all means, have at it. They’re awesome. If you can’t, don’t feel like you’re missing out, because you’re not. If you’ve got a decent set of 40s or 50s on a reasonably equipped road bike that’s mechanically sound, at that point it’s simply a matter of working on the engine if you can’t (or don’t want to) keep up.
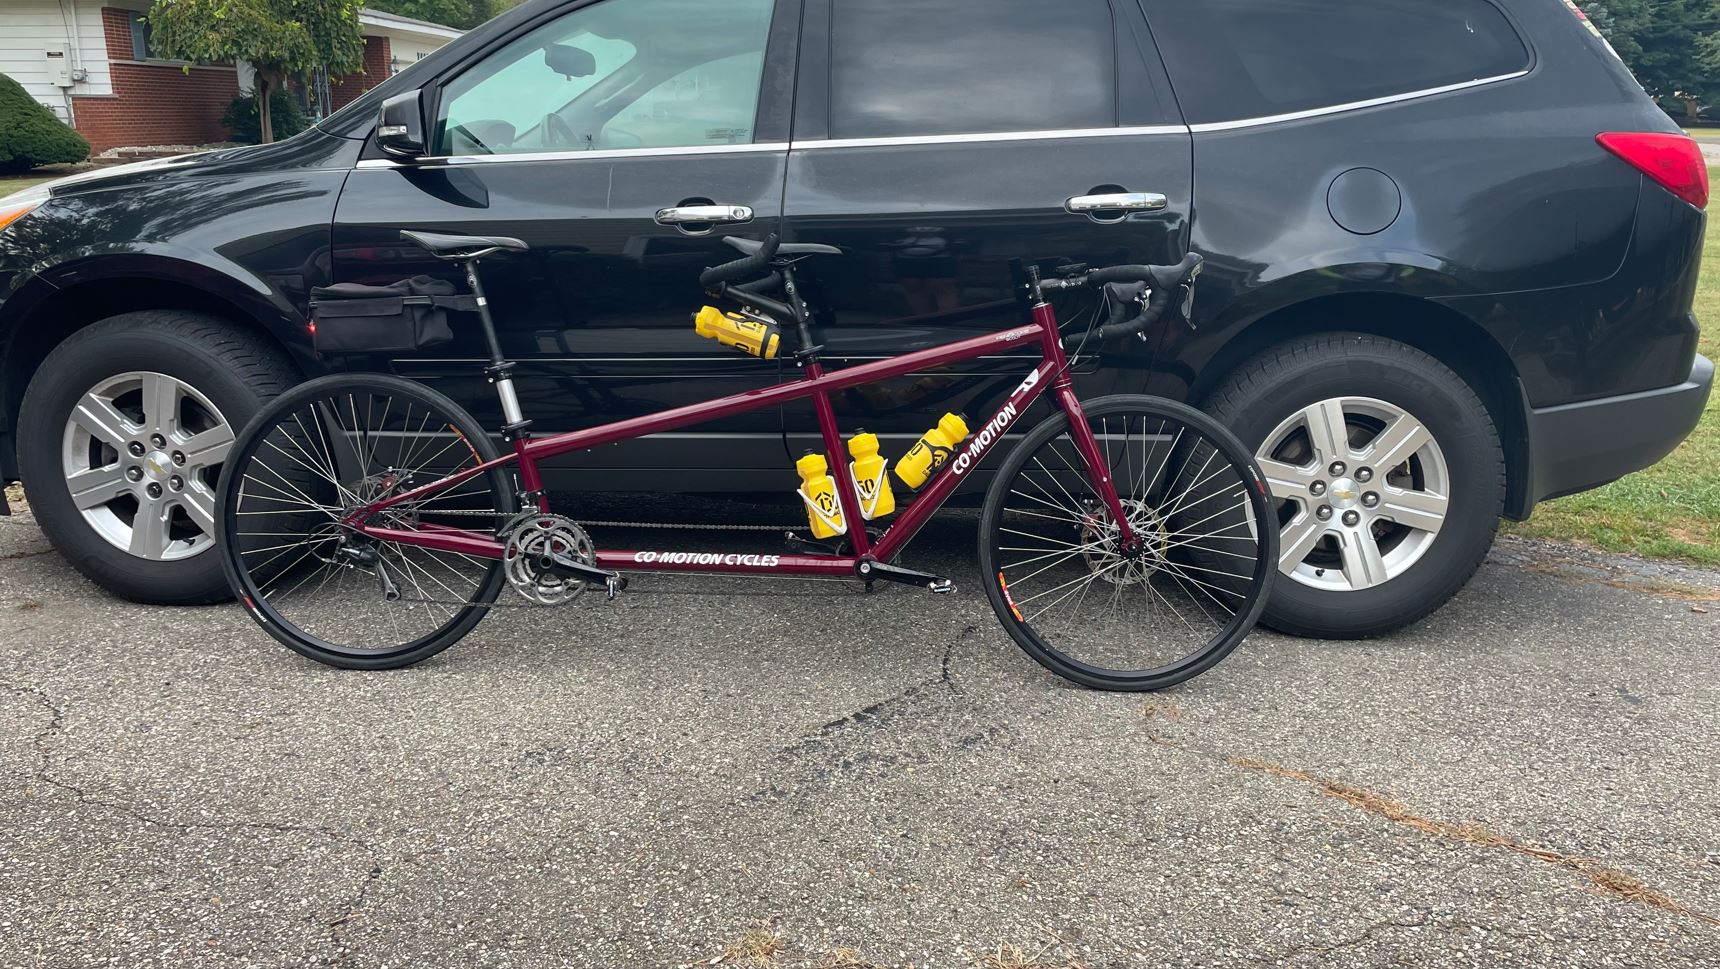
Cycling and the Finer Points of Cockpit Setup (and I Do Mean the Finer Points)
Originally, I was going to start this post out by pointing to my Trek 5200’s setup as the pinnacle of my achievement in terms of bike setup that took almost ten years to perfect, but that isn’t the case anymore. My greatest achievement was setting up my wife’s new (to her) Assenmacher so that when she climbed aboard for the first time after all of the changes she said, “This feels great, let’s go with this.” My wife is exceptionally finicky about her bike setup so that was a massive compliment.

Setting up my own bike was easy. My wife, being tougher about her setup than I am, I also had to learn how to adjust her setup based on conversation rather than feel. As a true, “please let me fix this” guy, nothing was more satisfying than putting even more than I put into my own bikes into my wife’s bikes and having it work out to her satisfaction.
Our tandem would have to be next for at least a couple of reasons. I’ve got a ton of time into setting up our tandem, between the two of us. Again, setting up my wife’s half of the bike was even tougher because that was the first time I put my full effort into working setting a bike up for my wife. Normally, I’d always left my wife’s setup to the pro at the local shop. I figured he was way better than me, so it made sense. While there’s no doubt he’s more knowledgeable, he can’t possibly take the time I could to work with my wife. The best he could do was move a few things and say, “Try that”. I took my tools and rode with my wife, stopping every now and again to adjust things little by little until we hit pay dirt. The front half was a little easier as the shop had the cockpit setup done to match my Trek before I ever brought the bike home.

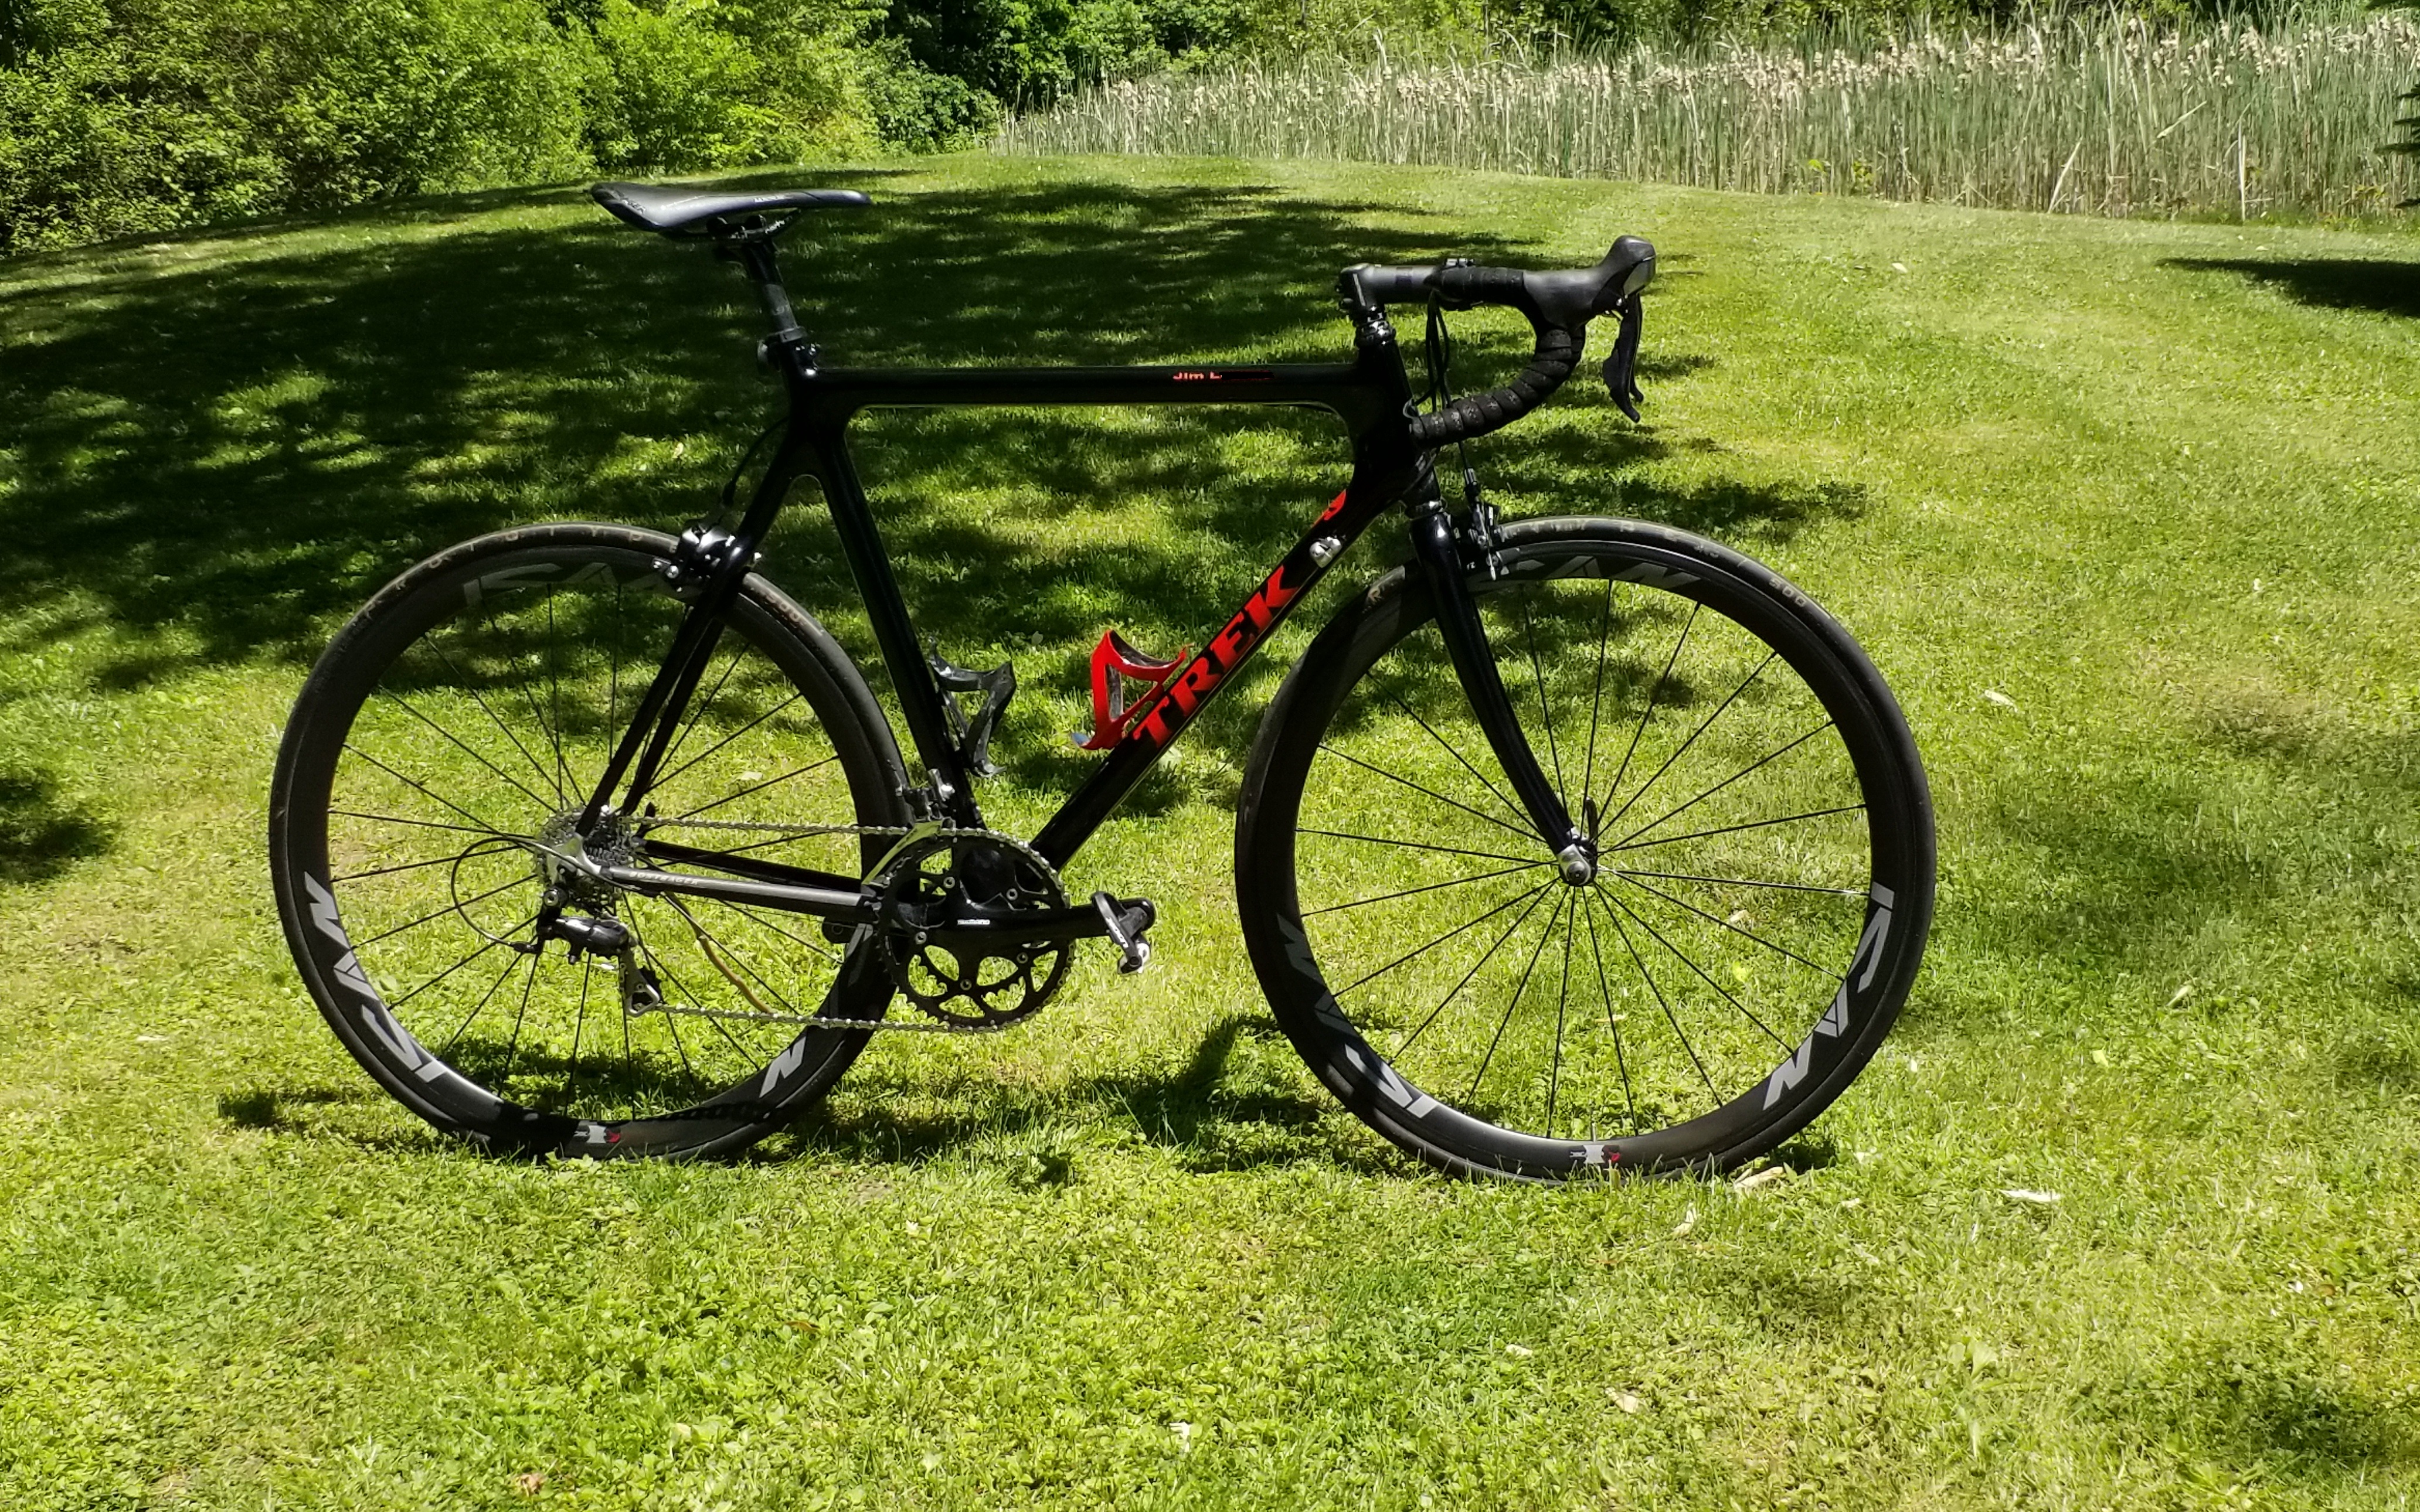
Finally, we get to the Trek. At this point, all of the bikes in my stable are set to my approximation of “correctly”, but the Trek is the one that blazed the way. Here are the little details in setting up the cockpit so it works with the bike’s geometry and my reach:
- The hoods are tilted up about 5°. This was a new revelation watching a setup video on YouTube a couple of years ago.
- There’s a 5mm spacer below the stem – without the spacer, the handlebar sits just a touch too low for comfort.
- The stem, with a classic frame and rake, is 17°, flipped to give it that parallel to the ground look.
- On a compact frame (with a sloped top tube), the rake changes and 17° is too steep, you’d need a 12°.
- The reach is standard, for the handlebar, but the drop is a little shallower than normal.
- I went with a 42cm wide handlebar and am quite happy with it.
- In order for me to ride comfortably in the drops, I’ve got the saddle nose down 2°.
For my wife’s bike(s), she’s more flexible than I am, but not by much. She doesn’t like tolerating the steep drop from the saddle to the handlebar that I do/can, so I had to learn a few tricks. Second, as can be seen in our tandem photo below, Jess’s saddle is almost exactly as high as mine. Her legs are actually a little longer than mine even though I’m a couple of inches taller. She’s also got a leg longer than the other, but that imbalance wasn’t fixed with the bike. We shimmed the insole of her shoe.
- This isn’t technically a cockpit thing, but it absolutely is; I had to drop the nose of my wife’s saddle quite a bit to get the front of the bike to work properly. So, it isn’t a cockpit issue, but the front of the bike can’t work unless the back of the bike is in order first. My saddles are set between 1 and 2° down. My wife is 5°.
- My wife needed a shorter stem, I think that’s a 60 with a 12° rise, so I could keep her from stretching too far.
- I didn’t change the spacer stack from the way it came when we brought the bike home, I just relied on the rise in the stem to bring the handlebar up to where my wife needed it.
- Notice the handlebar isn’t rotated back to raise the hoods… I had to loosen and adjust them after I set the handlebar to get that 5° rise from parallel to the ground. Try to avoid over-rotating the handlebar to move the hoods as this leads to poor placement of the hands in the drops. You’re not going to be as comfortable in the drops, as a rule, but you should be comfortable enough you can ride in them without feeling like a fish out of water for ten to thirty minutes.
- The final trick I used for my wife’s cockpit setup was the short reach handlebar. This brought the hoods in closer to where she needed them. The original bar, a nice carbon fiber deal, had a massive 7″ reach. The reach had the hoods so far away, she preferred to ride with her hands behind the hoods. A normal handlebar has a reach between 4″ & 5″. She needed something short of standard, so I picked up the bar on her Assenmacher for $40 at the local shop. She’ll have a short reach carbon handlebar as a birthday or holiday present in the near future.
There are so many opportunities for jokes in Number 5, I can’t refrain from acknowledging them. I know.
Bicycle Paint Repair; The (Best) Easy Way to Fix Chipped Paint
Early last spring during a spring cleaning round, my wife came out of the garage in tears. She was trying to lift a folding table over my prized Trek 5200 and accidentally scratched the paint on the top tube. It was down to the paint layer, through four coats of clearcoat, but not down to the primer.
We had just begun fixing our marriage and she was distraught that something this big might throw our whole marriage recovery into a tailspin. With the old me, I would have given her reason to worry. With the new me, it wasn’t even going to be a blip. In fact, I looked at it that my wife’s being as visibly distraught as she was as a sign we were making immense progress. That epiphany alone made having my frame scratched up worth it.
In fact, I considered leaving it as it was as a reminder of where we’d been and how far we’d come. Besides, the easy way to fix a chip or a scratch is with nail polish, but that’s not exactly the prettiest best way to fix a chip or scratch. Put simply, it fills ugly. The best way to fix a scratch or a chip is to airbrush the color and clearcoat over the scratch/chip after its been sanded down. I don’t have the equipment or patience for that. My wife, however, asked me about fixing it months later, so we started looking into nail polish. The old black polish I’d used on the frame had mysteriously grown legs and walked away… likely to the room of one of my daughters, but who knows, I could just have easily misplaced it. We’ll never know at this point, because my wife did me one better while we were out roaming Meijer (it’s a massive grocery/everything you need for daily life warehouse). She suggested this:

I didn’t know it at the time but my wife was a genius. The scratches were located on the exact top of the top tube, so when I laid the gel nail polish over the scratches, gravity pulled the polish into the scratches and the nature of the gel formula made it so the scratches filled much better than I would have expected. In fact, unless you really know what you’re looking for, you won’t find the scratches without an up-close visual inspection.
So, that’s my new trick, folks. Nail polish is, without question, the easiest way to cover up a chip or scratch in the paint. If you really want to cover the imperfection the best you can without pulling out an airbrush, try a “gel-like” polish and get that blemish facing “up” so gravity will help you fill the area without leaving ugly edges.
If you look at the fine print above, it’s a “gel like” polish. Apparently certain gel polishes require a UV light to harden – my wife says these are referred to a shellacs. Being the male of the species, I don’t know a thing about nail polish, but some quick Google searches produced the results that there are “gel” polishes that require setting with a UV light to set. Also, shellacs are, according to Cosmopolitan Magazine, the mix of regular polishes and gels and still require UV light. So, the “gel-like” polish is a regular polish, without the hassle of needing a UV light to set it. And now I know way too much about nail polish.
Merry Christmas, My Friends!
Well, the snow did finally get here, though we only got a total of about 6″ over the last few days and it’s beautiful outside!
Sadly, if we’d have taken Brent’s advice and bought fat bikes, we’d… still be riding our trainers this morning. It’s freaking cold outside! We’ve got a current temp of 15° with a wind chill of -1° (-9 C and -16 C in Moose Latin). I won’t ride below 20, anyway.
That said, it’s looking a lot like Christmas around here and I love it!
Happy Holidays!
How to Set Up a Bike’s Cockpit for Comfort AND Performance; Splitting the Hair Between Pain and Sane.
In my last post I covered the general setup of a bike. Originally, I started with this post but I realized I needed the previous first so I could get to this one… so I took about four days to write the last post before getting to this one.
So, assuming we get the crankarm length, saddle height, setback and tilt right, next we turn our attention to the cockpit. We want to concern ourselves with reach, handlebar drop, and the geometry of the handlebar itself, next.
Now, common sense says we’re going to take the setup we enjoy and just carbon copy it over however many bikes we have, right? Well, I had other ideas. This whole experiment started with our tandem. The bike started its life as a flat-bar hybrid but we swapped the 8-speed mountain bike drivetrain for a Shimano 105 10-speed road set. I required a 130mm stem to get the reach far enough out but we could have gone even further to match my Trek 5200’s reach. We opted instead to stick with the 130 and set me up in a less aggressive posture as we probably wouldn’t need the aerodynamics as much on that bike (two people pushing with the wind load cross-section of one). It worked so well, I opted for the same for my gravel bike. I should have used a 120mm stem but opted for a 110 so I could sit slightly more upright for pothole avoidance comfort. It’s as comfortable as my Trek, again.


For the Trek, I’m currently using a 90mm stem where I should have used an 80 (this was actually a mistake in ordering – I thought I needed a 90, but oops). To counter the extra centimeter I rotated the hoods up by about 5° from parallel to the ground. That was an interesting revelation itself. One of the mechanics from the shop, a young budding mountain biker trying to go pro, let me know in no uncertain terms that all of the cool kids set their hoods parallel to the ground, so that’s naturally what I did. I was a cool kid, even if I was old. It was only later, after my umpteenth YouTube video that a true pro setup artist came out and said the whole “hoods parallel to the ground” thing is ridiculous and bad for the wrists, that I changed and am much happier for it. In my case, it brought the hoods just close enough and relieved an unnatural bend in my wrists.

Then there’s my Specialized Venge. It still has all of the bad habits. Slammed AF stem, hoods parallel to the ground, 12° stem, flipped… 100mm reach (this is actually the proper length for a 56cm compact frame for me).


So, the point of all of this is quite simple; don’t think you’re stuck with one setup that has to be applied against all bikes to maintain comfort. That’s simply not how it works.
If I had to, I couldn’t pick which bike is the most comfortable. Each has its own attributes. I can say this, though; don’t be constrained by the notion that all of your bikes have to be as close as possible in their setup. The back half of the bike matters a lot. The front half, not as much.
Whatever you do, don’t think you have to set your bike up a certain way to match those of kids who are 30 years younger and paid to ride a bicycle in an uncomfortable position. I get close enough for government work, but I’ve come to find comfort most important.
How I Set Up Different Bikes with Different Geometries Across Different Species to Feel Alike… Or, At Least, To Be Comfortable.
Que Mission Impossible music…
It’s not. Please give me a minute…
I have become the bike setup guru for my wife and me. I have watched countless videos (and by countless, I mean that), spoken with experts, and conversed casually with more avid enthusiast cyclists than I can list in my pursuit of setup perfection. I am a middle-aged, Lycra-clad kid on a toy worth several Thousands of Dollars (how many Thousands of Dollars depends on which toy…).
Originally, back several years ago, I was all about speed and a sleek, low cockpit with the brake/shifter hoods parallel to the ground. Today, with a few extra barbecue pounds on board, I’ve tempered that need to have a bike that looks cool with something that more approximates my age and, erm… flexibility.
Now, contrary to popular opinion, we’re not stuck with one exact geometry that should work across multiple bikes. We can set multiple bikes up identically, or we can also tailor each bike to a different need. This is exactly what I’ve done with my wife and her three road bikes and a gravel bike, and my two road bikes and a gravel. And let’s not forget the newly most important of all those, our tandem!
My wife’s bikes were super tricky because each has a spectacularly different geometry and size for each bike. One compact 54cm frame with a triathlon-specific geometry (a Specialized Alias), one classic 54cm frame (a steel Assenmacher), and a 56 compact frame (a Specialized Secteur). There’s no way to set all of those identically.


My road and gravel bikes were easier to set up alike but I chose to set each one up for specific purposes. I didn’t have the triathlon geometry to mess with. I have two compact 56cm frames and one classic 58.


Then there’s the tandem!

Point is, that’s a lot of bikes to set up with different pedals, cranks, cleats, shoes… etc.. Anyway, the saddle height can be different betwixt gravel and road pedals and shoes.
I started with my bikes because I could feel what I wanted or needed. That was a problem when moving over to my wife’s bikes. I tended to leave my wife to the local shop owner, a good friend of ours, because he was a pro and I was lost without having the benefit of feel. In the end, I came to realize nobody could put the energy and attention I could to my wife’s comfort like I could, so I learned some new tricks. Learning to set my wife’s bikes and the associated setups was exceedingly difficult because she didn’t have the same database of knowledge or the same dictionary I did so we had to work on both of our vocabularies to get things situated.
Delving right into this, the areas of importance, assuming we’re on a properly sized bike, are as follows:
Crank arm length is first. That can be within a little bit one way or the other, but I’m still with the old camp that says you want to be pretty close to that recommended crank arm length without going (too) far over it. Without that, I feel it’s too difficult to get anything else right. Then, saddle height, saddle setback, saddle tilt, stem length, stem rise, spacer stack, handlebar reach and drop (this has to do with the actual handlebar reach to the hoods and the drop depth). We don’t need the cockpit right to get the saddle set properly, as long as the handlebar is close enough and high or low enough to rest our hands on the top of the handlebar as we get started. Then I work in that order… going back to height after setback and tilt are done. I’d say the bike I had the toughest time nailing down was the tandem. First, you’ve gotta get everything a little more close than any other bike because you’re in the saddle so much on a tandem. You don’t get the same out of the saddle climbing relief because, unless you and your rear admiral are experts, climbing out of the saddle is HARD on a tandem (you can’t rock the bike like you would on a single bike, not without falling off of it). Saddle height, setback and tilt are exceedingly crucial.
For my wife, it was a challenge because her road bikes are so different. Her gravel bike, I got right by pure luck. Had no idea what I was doing, we adjusted height, setback and tilt a few times and all of a sudden, Jess was like, “Hey, that’s perfect!” The tandem took a lot of work because she had a lot of symptoms that had to be addressed. Saddle height first, because the saddle on the tandem is substantially lower on the tandem than it is on her gravel bike. Same with her road bikes. In fact, I think she’s got four different saddle heights on five different bikes! Again, though, only her trainer bike and gravel bikes are close in geometry (and they’re the two that are closest in saddle height).
The key takeaways from my experience with setting my wife up are that saddle height can change, sometimes dramatically, across a range different geometries. Meanwhile, the setback can be vastly different depending on the geometry of the bike (my wife’s Specialized Alias, the TT-road bike mashup) but can be made to feel like the others if the order above is followed.
In my next post I’m going to look at just the cockpit… because I’ve evolved over the last twelve years.
Just a Kind, Happy Holiday Reminder!
I realized, yesterday, that things are going WAY too back to normal. The one good thing about the pandemic was that it made staying the f*** home when you were sick, acceptable.
In the spirit of the Holiday Season, please remember, to the sociopathic, narcissistic shits, nobody else wants your illness. If you still don’t feel well, you’re still contagious. If you still choose to go out, stay away from people, douchebag.
And wear a freaking mask so everyone else knows to keep their distance because you’re choosing to go out.
Sheesh.
Happy Holidays!!!
